Showing posts with label Adobe Photoshop. Show all posts
Showing posts with label Adobe Photoshop. Show all posts
Wednesday, January 13, 2010


Make Your Own Grunge Brushes"
I'll show you a fairly simple yet very effective method of making good grunge brushes in this tutorial. Enjoy.
1. New Document
First of all, as usual, create a new document in Photoshop. This is up to you, do you want a very large brush that you can size down every time you want to use it? Or do you want a brush around 200 pixels in size so that it’s ready for use whenever you want to use it in a small document. It’s probably best to use a very large document size for this tutorial, but I’ll just use a small size for the sake of learning.
2. Initial Brushing
Get out one of the standard soft brushes that come with Photoshop. Size it up to whatever size you would like it, then brush a few blobs onto the background. These are the settings I’ve got:

This is what my random brushing looks like:

Now merge all of your layers together, so that you only have one layer.
3. Apply Texture
The next thing we need to do is apply some sort of texture to the brush. Start by finding a good texture on the internet. For this tutorial I’ve used this dirt texture that I took a few months ago.
Add the Texture to Photoshop so you can use it willingly.
Open up your texture and save it as a PSD file onto your desktop.
Now back to your brushing document. Be sure your layers are merged together, then go to Filter > Distort > Displace, using the settings shown below, or similar.

After you press OK (shown in the top right of the above screenshot) you’ll be asked to choose a PSD file, this is used to displace the current document. Choose the PSD that you earlier saved to your desktop.

Looks pretty decent in my opinion, but be sure you mess around with different settings and textures.
4. Finishing Off
To finish this off, get another grunge brush either you made or someone else, and brush a little bit over the edges with white as your foreground color.

You may also want to apply Filter > Sharpen > Sharpen to your brush layer, to give it a little more detail. Remember to get creative, remember to try different textures, filters, layer modes, etc.


MASSIVE Credit goes to Photoshop Star and GEEKY GRAPHICS
Spike Ball
Step.1.Create a new image 500x500px with a "transparent" background. Press D to reset the Foreground and Background colors. Fill ( Edit > Fill ) in the only layer with Black ( Hex #000000 ).

Step.2.Using the Elliptical Marquee Tool, make a perfectly circular selection (press shift while selecting) in the middle of the layer. Render some Clouds ( Filter > Render > Clouds ).
Deselect by either clicking outside the selection or pressing Ctrl-D.

Step.3.Extrude ( Filter > Stylize > Extrude ) the layer with the settings shown to the left.


Step.4.Colorize the image by opening the Hue/Saturation window ( Image > Adjustements > Hue/Saturation ) and using settings similar to the ones in the image to the left. You can play around with the values as you wish.
Want your 3D Spike Ball to be more glowy?
Step.5.First, duplicate the layer with the ball and background on it. Change the Blending Mode of the new layer to "Overlay". Apply a Gaussian Blur ( Filter > Blur > Gaussian Blur ) with a strength of around 4.5pt.


"Grunge Effect"
We will end up with something like this at the other end of the tutorial

Step.1.open new doc 600x600 can e any size but this size is nice to start out with
Step.2. Get paint bucket and make the background BLACK

Step.3. Select the word and font going on the page E.g "Nerdy Music Graphics"
Step.4. After you are happy with fonts and text you can make a new layer and move it under all the texts in the Layers Panel.
Step.5. This is where you need to have some Grunge Brushes witch you can make yourself in our other tutorial HERE or you can take the lazy way out (witch I have done) and download them HERE.
So you should be looking something like this at the moment.

Step.6. Now you can forget about the text for a little while and focus behind it, if you really want you can make the text invisible for this section but we wont.
Step.7. Choose you colours and grunge brush then start to put the brush on the screen while alternating colours but make sure you are making a new Layer every new brush so it is easy to edit if you dont like it.
Here are steps of its look with the different grunge brushes and colours after a couple of goes


Step.8. Keep doing that until you have happy with the outcome
I have taken away my text so i can show you what it should now look like after the end product of the brushes (below)

Step.9. Now we will start to work on out text again witch is quite simple just go to Layer > Layer Style and make our text look cool. I usually use stroke and bevel and emboss for a simple effective effect when im in a rush etc....
Step.10. You're done. If having any problems, please contact me at nerdymusic-graphics@vintagepeace.com.
Finished Product


Black

White

CREDITS-GEEKY GRAPHICS
Jannette McCurdy Smile
For this tutorial this is what we will be making.
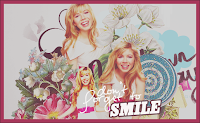 here are the following textures and brushes you will need:
Texture1
Brush1
Flower Texture1
Flower Textrure2
Flower Texture3
Brush2
Lollipop Texture
ok so take the first texture,crop it coz its too big,
than take the 1st brush and set it to darken,
than take the 1st flower texture and put it there and then sharpen it 2 times maybe
than take you picture(it has to be a cut-out) and put it in the blend, don't forget to sharpen it.
Now take the 2nd flower texture and put it in the blend also sharpen it 2 times,
than the 3rd flower texture set it in the blend and sharpen it 2 times.
Than take the 2nd brush and invert it than merge it and put it in the blend and set it to darken.
Than take the lollipop texture ans put it there don't forget to sharpen it 2 times.
than take your pictures and place them in the blend.
Now color the whole blend,if you want my coloring I'll upload the psd.
Now make a new layer and go stroke the blend with the with 18 and color #a7385b
and make a new layer again and stroke with the now the font part i used Pea Steph and Cairo but you can change that
and i think that's it.
sorry im a bad explainer.
PSD
Credits-http://secretgraphix.blogspot.com
 here are the following textures and brushes you will need:
Texture1
Brush1
Flower Texture1
Flower Textrure2
Flower Texture3
Brush2
Lollipop Texture
ok so take the first texture,crop it coz its too big,
than take the 1st brush and set it to darken,
than take the 1st flower texture and put it there and then sharpen it 2 times maybe
than take you picture(it has to be a cut-out) and put it in the blend, don't forget to sharpen it.
Now take the 2nd flower texture and put it in the blend also sharpen it 2 times,
than the 3rd flower texture set it in the blend and sharpen it 2 times.
Than take the 2nd brush and invert it than merge it and put it in the blend and set it to darken.
Than take the lollipop texture ans put it there don't forget to sharpen it 2 times.
than take your pictures and place them in the blend.
Now color the whole blend,if you want my coloring I'll upload the psd.
Now make a new layer and go stroke the blend with the with 18 and color #a7385b
and make a new layer again and stroke with the now the font part i used Pea Steph and Cairo but you can change that
and i think that's it.
sorry im a bad explainer.
PSD
Credits-http://secretgraphix.blogspot.com
Cute Notebook
This is what we are making
![[tom.png]](https://blogger.googleusercontent.com/img/b/R29vZ2xl/AVvXsEhOh2hN66bWdrkmlXBkB5nyOpQUoMAOSl6HvrqUnggA8tk2dA0q2JqyurmwGAPY2jljM09PoGsiCN5HYbD1a4zcJkzNPvCVqZ1RPOaSa0mEDNnJtE2c_Y4m80SWXuyfDXvJv7L74TrkqbE/s1600/tom.png)
this is long...
1) Open up a blank canvas with the size 490 x 240. You can make different dimensions if you wish but I just used that to keep it simple. Lay down this texture down as the first layer. This will be a part of the background of your signature.
2) Take this texture and paste it as a new layer. Set it to 'darken'.
3) Now take this texture and paste it down as a new layer. Set it to 'darken'. You might want to move it to the center. Mines a LITTLE off center to the left but that's not that much of a big deal and barely noticeable.
4) Take this texture and place it as a new layer on the left side of the notebook. Set it to 'darken'. Move it around until you get it where you would like it. Make sure a little bit of it hits the spiral of the notebook so it looks .. cooler. Not really, I don't care just put it wherever haha! You can always change it later after you place your pictures down anyway.
5) Take this texture (so many textures!), paste it as a new layer, and set it to 'lighten'. Drag it to the center of the spiral notebook so you can see some of the orange sparks.
6) Next, take this texture, paste it as a new layer, and set it to 'darken'. Move it around until you like where you put it. You can always move it around later.
7) Now on to the pictures! you can recolour the,m if you want. i didnt but it looks good coloured.
8) Place down the first picture on the left side of the spiral notebook. Place it in the center of the texture you placed down in 'Step 4' (the stars and spiral texture) and make sure it's somewhat in the center of the left side of the notebook you're placing it on.
9) Take your second picture that you're using, color it, resize it as the same size (or around it) as the first picture. Place it on the right side of the spiral notebook texture. Make sure it's not DIRECTLY in the center but off to the left (or right, depending on the picture) a bit. Look at the signature above to see what I'm taking about.
10) Take the resized picture of the first one you used and make it a little bit smaller so it fits next to the one on the right. Place it down (make sure they are not TOO close together) and cut the left side (or right, depending on the pictures you are using) so it doesn't cover up the picture it's overlapping.
11) Now take the FIRST resized picture you used on the right and make it a little smaller but not as small as the one you used right before this. Place it next to the one that you just cut. Make sure it's not too close. Now cut the side that's overlapping either of the pictures in back of it.
12) Take this texture, resize it (I resized mine to around 100x100), and place it around their heads. Not exactly ON their heads because that would just look awkward, but around it. I used it three times but you can use it as many times as you want. 12) Woo, time fore more textures! Use this texture and place it over the left picture and the right pictures. Make sure none of it is covering their faces. I used the texture four times and placed them all through-out the signature but you can decide how many times you want to use it!
13) Take this bow texture and place it at the top-left corner of the signature. Make sure you rotate it a little so you don't overlap the picture's head. You can re-color it any color you want - be creative with your color scheme!
14) Take polka-dotted texture and resize it so it's tinier than the picture, but not too small! Take a look at the example I made up above. Place it BEHIND the picture. Don't forget to recolor it the same color as you colored your bow texture! I also took that same resized texture and placed it behind the pictures on the right because it looked so bare. You don't have to do that though, I just chose to.
15) Time for text! I used the font "Clementine Sketch" you can find it on dafont.conm. Put it in the right-hand corner of the signature. Next, on that same layer, take the SAME color as the bow and polka-dotted texture and get the circle brush size and set it to around 7. Then scribble 'nicely' behind each letter. Don't over-do it! Check out my signature for an example.
16) (optional) I placed this texture over everything and set it to 'lighten'. I erased the bit that really covered the pictures but left the 'barely noticeable' part.
17) (optional) I placed the same texture used in 'Step 12' and placed it over the text to give it a 'cool effect'.
That's it! Sorry this is so abnormally long .. it's basically my first 'signature' tutorial and I wanted to make sure I got everything down. I'm sure I messed up somewhere, and I KNOW I stink at explaining things, but whatever! I'm sure you'll have an 'OKAY' time trying to understand this. Let me know if you get confused haha because yeah, I just really stink at explaining these type of things.
Credits-http://secretgraphix.blogspot.com
this is long...
1) Open up a blank canvas with the size 490 x 240. You can make different dimensions if you wish but I just used that to keep it simple. Lay down this texture down as the first layer. This will be a part of the background of your signature.
2) Take this texture and paste it as a new layer. Set it to 'darken'.
3) Now take this texture and paste it down as a new layer. Set it to 'darken'. You might want to move it to the center. Mines a LITTLE off center to the left but that's not that much of a big deal and barely noticeable.
4) Take this texture and place it as a new layer on the left side of the notebook. Set it to 'darken'. Move it around until you get it where you would like it. Make sure a little bit of it hits the spiral of the notebook so it looks .. cooler. Not really, I don't care just put it wherever haha! You can always change it later after you place your pictures down anyway.
5) Take this texture (so many textures!), paste it as a new layer, and set it to 'lighten'. Drag it to the center of the spiral notebook so you can see some of the orange sparks.
6) Next, take this texture, paste it as a new layer, and set it to 'darken'. Move it around until you like where you put it. You can always move it around later.
7) Now on to the pictures! you can recolour the,m if you want. i didnt but it looks good coloured.
8) Place down the first picture on the left side of the spiral notebook. Place it in the center of the texture you placed down in 'Step 4' (the stars and spiral texture) and make sure it's somewhat in the center of the left side of the notebook you're placing it on.
9) Take your second picture that you're using, color it, resize it as the same size (or around it) as the first picture. Place it on the right side of the spiral notebook texture. Make sure it's not DIRECTLY in the center but off to the left (or right, depending on the picture) a bit. Look at the signature above to see what I'm taking about.
10) Take the resized picture of the first one you used and make it a little bit smaller so it fits next to the one on the right. Place it down (make sure they are not TOO close together) and cut the left side (or right, depending on the pictures you are using) so it doesn't cover up the picture it's overlapping.
11) Now take the FIRST resized picture you used on the right and make it a little smaller but not as small as the one you used right before this. Place it next to the one that you just cut. Make sure it's not too close. Now cut the side that's overlapping either of the pictures in back of it.
12) Take this texture, resize it (I resized mine to around 100x100), and place it around their heads. Not exactly ON their heads because that would just look awkward, but around it. I used it three times but you can use it as many times as you want. 12) Woo, time fore more textures! Use this texture and place it over the left picture and the right pictures. Make sure none of it is covering their faces. I used the texture four times and placed them all through-out the signature but you can decide how many times you want to use it!
13) Take this bow texture and place it at the top-left corner of the signature. Make sure you rotate it a little so you don't overlap the picture's head. You can re-color it any color you want - be creative with your color scheme!
14) Take polka-dotted texture and resize it so it's tinier than the picture, but not too small! Take a look at the example I made up above. Place it BEHIND the picture. Don't forget to recolor it the same color as you colored your bow texture! I also took that same resized texture and placed it behind the pictures on the right because it looked so bare. You don't have to do that though, I just chose to.
15) Time for text! I used the font "Clementine Sketch" you can find it on dafont.conm. Put it in the right-hand corner of the signature. Next, on that same layer, take the SAME color as the bow and polka-dotted texture and get the circle brush size and set it to around 7. Then scribble 'nicely' behind each letter. Don't over-do it! Check out my signature for an example.
16) (optional) I placed this texture over everything and set it to 'lighten'. I erased the bit that really covered the pictures but left the 'barely noticeable' part.
17) (optional) I placed the same texture used in 'Step 12' and placed it over the text to give it a 'cool effect'.
That's it! Sorry this is so abnormally long .. it's basically my first 'signature' tutorial and I wanted to make sure I got everything down. I'm sure I messed up somewhere, and I KNOW I stink at explaining things, but whatever! I'm sure you'll have an 'OKAY' time trying to understand this. Let me know if you get confused haha because yeah, I just really stink at explaining these type of things.
Credits-http://secretgraphix.blogspot.com
Graph
This is what we will be making today
![[Selena+gomez.png]](https://blogger.googleusercontent.com/img/b/R29vZ2xl/AVvXsEiE9B3mPvBX7M_zJotFohmR72UWPSVyMDYcZlt5ZWnfCsUhMqm7169g7qz6m3u3F8fBd1Cu7impIGzqX75BPQvICEEnS5sZwYNwmdbfwTJyw-AKiosmhO4xiAeb_iyuujaeYtIuLfcaIzU/s1600/Selena+gomez.png)
you will need these textures
Graph Paper
Flower
Frame
Clouds
Scribble
1. Open up all the pictures that you want to use and color them. MAKE SURE YOU COLOR THEM AND DO WHATEVER YOU WANT TO DO NOW. Resize, sharpen, etc.
2. Open a new transparent image for your sig. It doesn't matter what size it is, it's up to you.
3. Place the graph paper on the new image. If it doesnt cover the whole image, paste it again and move it so the squares match up and it looks like the same image. Don't stretch the image, it will get blurry.
3. Take the first photo you want to use. Crop it to a rectangle, and resize it to a size where the whole image will fit on the sig. Paste it on your sig.
4. Crop all your other photos and resize them to sizes smaller than the first image you posted. Crop them to differnet shapes to add contrast. Add a border to one if you want. Overlap them and try to keep them to one side of the sig.
5. Take the flower and the clouds and resize them to any size you want, and paste those in with the photos.
6. Take another photo and change it to black and white and select around it. Resize it and paste it back to the sig.
7. Add the frame in a layer underneath the black and white image but on top of the other images that you pasted.
8. Take the scribble and either keep it black and set it to multiply or change the color of it. If you want a different color and dont know how to get it, ask me and i will make it for you. Place it underneath all the layers so its behind your images, but still visible on the graph paper.
9. add text, any other textures you want, and that's it. Nice and easy, eh?
Credits-http://secretgraphix.blogspot.com
you will need these textures
Graph Paper
Flower
Frame
Clouds
Scribble
1. Open up all the pictures that you want to use and color them. MAKE SURE YOU COLOR THEM AND DO WHATEVER YOU WANT TO DO NOW. Resize, sharpen, etc.
2. Open a new transparent image for your sig. It doesn't matter what size it is, it's up to you.
3. Place the graph paper on the new image. If it doesnt cover the whole image, paste it again and move it so the squares match up and it looks like the same image. Don't stretch the image, it will get blurry.
3. Take the first photo you want to use. Crop it to a rectangle, and resize it to a size where the whole image will fit on the sig. Paste it on your sig.
4. Crop all your other photos and resize them to sizes smaller than the first image you posted. Crop them to differnet shapes to add contrast. Add a border to one if you want. Overlap them and try to keep them to one side of the sig.
5. Take the flower and the clouds and resize them to any size you want, and paste those in with the photos.
6. Take another photo and change it to black and white and select around it. Resize it and paste it back to the sig.
7. Add the frame in a layer underneath the black and white image but on top of the other images that you pasted.
8. Take the scribble and either keep it black and set it to multiply or change the color of it. If you want a different color and dont know how to get it, ask me and i will make it for you. Place it underneath all the layers so its behind your images, but still visible on the graph paper.
9. add text, any other textures you want, and that's it. Nice and easy, eh?
Credits-http://secretgraphix.blogspot.com
Simple Retro
this is what we will be making![[says+goodbye.png]](https://blogger.googleusercontent.com/img/b/R29vZ2xl/AVvXsEiNWRv4FdIxpTcJqkEC5xWJ0YjZiRuYKcCJIX_xhRu4zADkClOodM7rekTuEflKuUntqTMQYqBbFSXaD-COM0-GEE5pSNM7pK5xu66uXp5wE5zGKjic8WGHVWNUMVjDBULPYny7Ng382oI/s1600/says+goodbye.png)
for this tutorial you will need these textures:
TV Texture
Light Texure
1. Make a new image for your sig.
2. Find one image you want and paste it on. And then take that same picture and turn it to black and white and paste it next to it and blend it together.
3. Take the tv texture and place it in a new layer on top of the other layers. You may need to resize it.
4. use your point-to-point selection tool in psp or the magnetic lasso tool in ps and erase the inside of the tv.
5. Take another photo and resize it so it will fit behind the tv, and then place it udnerneath the tv texture. erase the parts that peak out from the sides.
6. Take another photo and then select around and copy and paste it onto your sig.
7. Take your rectangular tool and make a rectangle for your text.
8. Add text. For mine, i used the font "Clementine Sketch" and then "Georgia" for the text underneath.
9. Add the light texture, set it lighten, erase parts that cover the face.
10. Merge all/flatten and you're done.
Credits-http://secretgraphix.blogspot.com
for this tutorial you will need these textures:
TV Texture
Light Texure
1. Make a new image for your sig.
2. Find one image you want and paste it on. And then take that same picture and turn it to black and white and paste it next to it and blend it together.
3. Take the tv texture and place it in a new layer on top of the other layers. You may need to resize it.
4. use your point-to-point selection tool in psp or the magnetic lasso tool in ps and erase the inside of the tv.
5. Take another photo and resize it so it will fit behind the tv, and then place it udnerneath the tv texture. erase the parts that peak out from the sides.
6. Take another photo and then select around and copy and paste it onto your sig.
7. Take your rectangular tool and make a rectangle for your text.
8. Add text. For mine, i used the font "Clementine Sketch" and then "Georgia" for the text underneath.
9. Add the light texture, set it lighten, erase parts that cover the face.
10. Merge all/flatten and you're done.
Credits-http://secretgraphix.blogspot.com
Subscribe to:
Posts (Atom)